
Beginner Peppers
Beginner Peppers
Beginner Peppers
Hi here is my second Hydrostore blog for the month of April 2021. Once again there are many things that I am learning on my into the world of growing without soil, hydroponics!
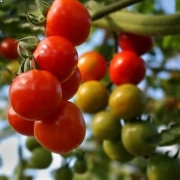
So if tomatoes are my favourite salad crop then peppers are certainly my second. Peppers provide a massive variety of colours and flavours. Of course from the red hot chili peppers such as “Scotch Bonnet” to the milder bell peppers that we use in regular salads. So some of the hotter peppers grown do in fact require hotter temperatures to grow them. Here in the North of England it depends on the type of summer that we are experiencing!
The spicy peppers are used mainly for cooking spicy dishes and are popular for spicy Indian dishes and West indian cooking. Of course we can buy a spicy pizza covered in spicy hot peppers if we like that kind of thing. However I generally stick to the mild flavoured bell peepers that come in many shapes and colours. Most peppers start off as green coloured fruit and later turn into the colour of choice. Hence, from bright red to yellow and even dark purple. Of course all these colours add brightness and colour to a great mixed summer salad! My mouths watering as I am writing this!
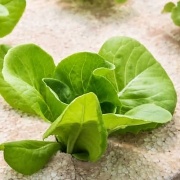
Try growing peppers the hydroponics method
Peppers are easy to grow and only suffer the usual pests. White fly and other aphid species are the general worst enemies. These can be controlled by the usual methods of spraying with soapy water or using a commercial brand such as “plant magic” bugicide from your local Hydrostore online, in different sized containers. So, a good way of determining the colour of bell peeper to grow is to buy one in your favourite colour. Say in this case yellow. The seeds can be removed and generally the plant will turn out to be the same colour as the parent plant, in this case yellow.
This year I am going to try germinate the seeds using the paper towel method. This is a popular way of germinating many plant species. Including peppers and tomatoes. The seeds are carefully wrapped between two lairs of tissue paper and placed in a saucer of water. The paper must be kept wet and not allowed to dry out!
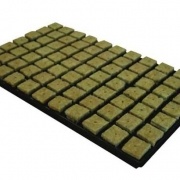
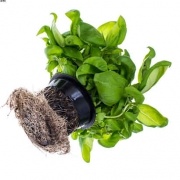
The seeds will eventually germinate and small green shoots will appear. So, these small plants will then be placed singularly inside of a rockwool cube. Always try to handle the seedling with great care. The rockwool is then to be placed inside a 3ins net cup. It is important to buy net cups with a lip around the top so that it fits snug inside the plastic tanks lid. Incidentally, I will be growing four pepper plants inside my 18×15 ins black plastic tanks (Totes) .
The tote lids have four holes cut in to take the 3 ins plastic net cups. I will then add “nutrients” into the water and place the cups and pepper plants into the tank lid and therefore the tank of water. In my case it will be CX hydrobase. So, I will be trying this out for the first time and will keep my readers up to date with the results. I shall also be using a small aquarium pump to circulate oxygen to the plants via the tanks water supply.
My set up will be in my greenhouse once the weather warms up. There will be plenty of light at this time of year! Of course this method can be used indoors by adding a LED lighting unit to your growing kit.